Cultivating Bounty: A Basics Guide to Herb & Vegetable Seed Starting
Embarking on the journey of seed starting is an exciting endeavor for gardeners of all levels. Whether you’re nurturing delicious culinary herbs or cultivating hearty vegetable plants, the process requires patience, attention to detail, and a basic understanding of the region’s unique climate and growing conditions. In this guide, we’ll explore the essentials of herb and vegetable seed starting, from selecting the right seeds to nurturing seedlings through to transplanting.
Understanding What Hardiness Zones Are and Why They Matter:
Hardiness zones serve as a valuable tool for gardeners to make informed decisions about plant selection, timing, and garden management practices based on the climatic conditions of their specific region. By understanding and working within their hardiness zone, gardeners can create thriving and resilient gardens, despite variable weather conditions.

In the colder inland climates of Massachusetts, starting seeds indoors can be the key to getting a decent harvest from warmer weather crops, that require longer growing periods, such as tomatoes, peppers, cucumbers, and gourds.
According to the newly updated, 2023 USDA Hardiness Zone map, Bedford is currently in Zone 6B. The towns surrounding Bedford are also in Zone 6B, except for Carlisle, which starts to dip down into 6A to the West.
When you’re dealing with more permanent yard features such as perennial plants, shrubs, and trees, knowing your Hardiness Zone will help you to know which plants will thrive in your area, as well as winter survivability. Zone 6B, has an average annual extreme minimum temperature (over the past 10 years) of -5 to 0 degrees Fahrenheit. It’s worth noting that this is an average and not the lowest temperature that has ever occurred or might occur.
Where we can use this information in planning our gardens, and thus seed starting, is by offering us data on frost dates, the length of growing seasons, and microclimates in our area. Anyone can cultivate a lemon tree and plant it outside as it grows larger, but New Englanders know that our air and soil temperatures are not going to be hot enough to bear fruit, and our winters would kill it. Looking at averages over time, our frost-free growing season is approximately May 8th to September 29th.
Now that we have that crucial piece of knowledge for our seed selection, let’s take a look at how to prepare for starting our seeds. It’s also worth noting that purchasing your seeds at a local Garden Center, such as New England Nurseries, will take some of the guesswork out of determining which plants will grow in your area because that’s what we sell! (Keep reading to the end of the article for a list of popular herbs and vegetables, and their respective starting timeframes.)
Preparing for Seed Starting:
Gather your supplies before starting your seeds. You will need seed trays, potting mix, seeds, labels, and a watering can or spray bottle. Ensure your seed starting area receives ample sunlight or invest in grow lights to provide adequate illumination for seedlings.
Prepare your seed starting mix by combining equal parts peat moss, vermiculite, and perlite to create a lightweight, well-draining medium. Or, even better, Garden Centers such as New England Nurseries, sell ready-to-use Seed Starting Mix. Moisten the mix before filling your seed trays to ensure uniform moisture distribution.
Sowing Seeds:
Follow the planting depth and spacing guidelines provided on the seed packet for each variety. As a general rule, sow seeds at a depth approximately twice the diameter of the seed. Use a pencil or dibber to create furrows in the seed starting mix, then gently press the seeds into the soil and cover them with a thin layer of vermiculite or fine potting mix.
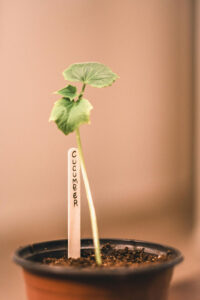
Label each tray with the seed variety and planting date to track the progress of your seedlings. Place the trays in a warm, sunny location or under grow lights to encourage germination. Maintain consistent moisture levels by watering from the bottom or misting the soil surface regularly.
Managing Temperature and Humidity:
Temperature and humidity levels play a crucial role in seed germination and seedling growth. Aim to maintain daytime temperatures between 65°F to 75°F and nighttime temperatures between 55°F to 65°F, for optimal seedling development.
During the germination period, cover seed trays with plastic domes or clear plastic wrap to create a greenhouse-like environment that retains moisture and warmth. Monitor humidity levels and adjust ventilation as needed to prevent fungal diseases and damping-off.
Transplanting Seedlings:
Once seedlings have developed their first set of true leaves and outgrown their seed trays, they are ready for transplanting into larger containers or outdoor garden beds. Harden off seedlings gradually by exposing them to outdoor conditions for increasing periods each day, starting with sheltered locations and gradually transitioning to full sun and wind exposure.
Choose a cloudy or overcast day for transplanting to minimize stress on seedlings. Dig planting holes slightly larger than the root balls of the seedlings and gently tease apart any tangled roots before setting them in the soil at the same depth as they were in the seed trays. Water transplanted seedlings thoroughly to settle the soil and promote root establishment. The fertilizer company, Bio-tone, makes a soil amendment that is formulated for seedlings that contains mycorrhizae, which is a beneficial fungus that draws nutrients from the soil to the plant. You would add this during transplanting and not before.
Zone 6 Planting Seed Starting Schedule:
Late-February: Bell Peppers, Celery, Jalapeno Peppers, Leeks, Oregano, Parsley, Rosemary, and Thyme;
Early to Mid-March: Arugula, Broccoli, Cabbage, Chives, Eggplants, Kale, Sage, and Tomatoes;
Mid-March to Early-April: Basil, Bok Choy, Brussels Sprouts, Cauliflower, Collards, Kohlrabi, Lettuce, Spinach, Swiss Chard, and Tomatillos;
Early to Mid-April: Cantaloupes, Cucumbers, Okra, Pumpkins, Watermelons, Winter Squash, Zucchini, and Summer Squash;
Things to start outside/directly in the garden (Timing varies, so check seed packets for exact timing): Asparagus, Beets, Carrots, Cilantro, Corn, Dill, Dry Beans, Fava Beans, Green Beans, Onions, Parsnips, Peas, Potatoes, Radishes, Salsify, Sweet Potatoes.

